

Listen here, THIS was a doozy. If you have any intentions of taking on this project, keep reading. If you don’t have any intentions of doing this project, I still promise to make it humorous, short, sweet, and painless.
The project itself wasn’t “difficult” per se, time consuming - yes, strenuous - yes, exhausting - yes, messy - yes, WORTH IT - Y.E.S!
“Be like a postage stamp, stick to one thing until you get there.”
As you can see in the “before” image below, this room was dark and old… and in desperate need of an upgrade. So we naturally went with the “old style” German Schmear LOL. Hey, it’s all comin’ back one way or another! This room is far from being completed but schmearing some brick was a great start.
WHAT WE USED
*IMPORTANT*
If you don’t read anything else READ THIS.
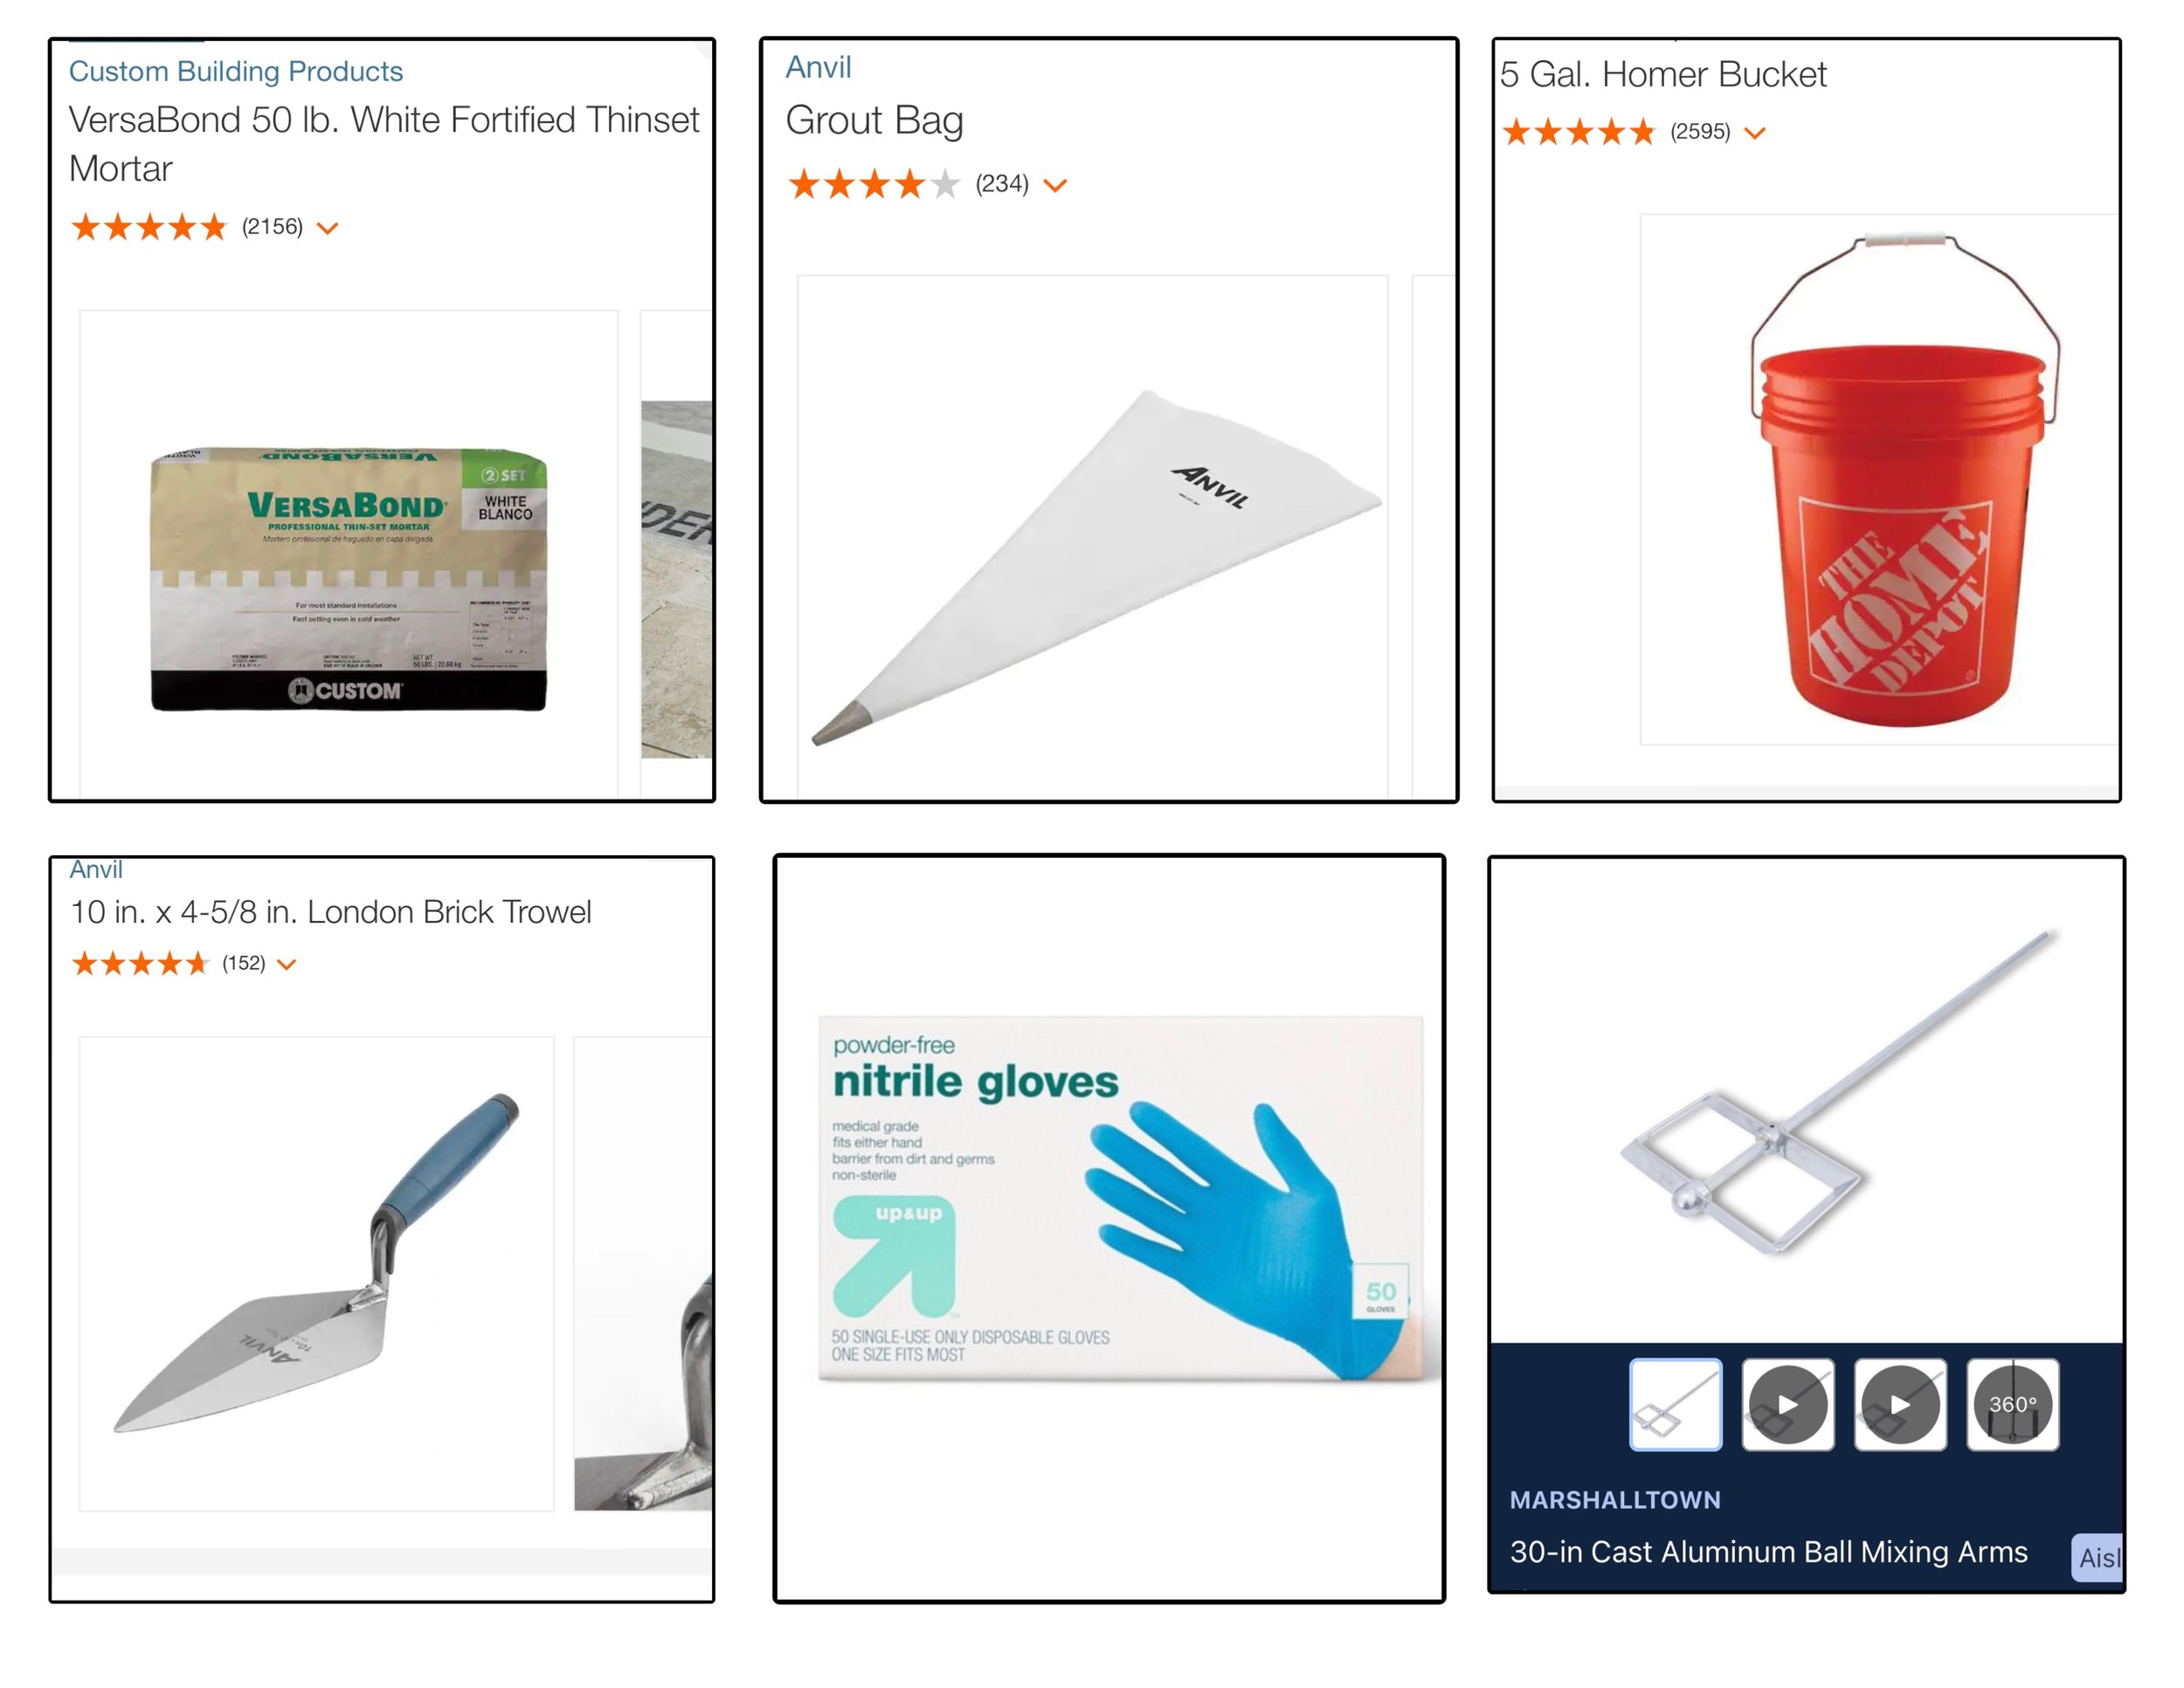
-WHITE MORTAR: Found in TILE SECTION (we barely needed 2 bags)
-GROUT BAG: Found in MASONRY SECTION (GET EXTRA* We ended up using 3 - only because we made many rookie mistakes)
-BRICK TROWEL: Found in MASONRY SECTION (Size isn’t overly important)
-MIXING ARM: Found in TILE SECTION (we didn’t need a 30” but we used one, you can use smaller)
THE STORY, OUR STORY
-We (my mom & I) had no idea what we were doing or getting ourselves into. We have never done anything like this before. So, here is what we learned along the way to hopefully alleviate the stress for other ambitious, naive DIYers like us.-
Mortar:
Don’t be like us, staring for WAYYY too long at mortar (and it was the wrong kind). We stared and stared down the masonry aisle but then asked ourselves, “Is this mortar even white”? Nothing specified if it was white, so we assumed it probably wasn’t. We had to phone a friend (he goes by Dad) - but we got where we needed to go, THE TILE AISLE. Who knew?! (Yes it works, yes it stays in place, and yes it is white) We bought 4 bags. We had NO IDEA if that was too much, too little, just right? Well, we only used 1 & 1/8 of a bag.. if we didn’t make so many mistakes we probably could have gotten away with just one bag.
ps: the bags are heavy
Grout Bag:
We originally purchased 2 (just in case). Well, let me tell you, we jacked up the first bag so bad we HAD to use our second one within minutes of starting this project. We ended up buying a 3rd just to keep things clean. My goodness, a new/clean grout bag is like G O L D.
PS: Fold sides of grout bag to avoid mortar going all over the edges, sides, ground, hands, hair, clothes, your buddy, etc! THIS TAKES AT LEAST TWO PEOPLE, I SWEAR. This is not a joke!
PPS: DONT OVER FILL (the more full the bag, the harder it is to handle/ control) Twist the living daylights out of the wide end of the bag so nothing squeezes out the back. If you’re a chef/baker, I’m sure you can back me up on this!
** We used a GARDENING TROWEL to scoop the mortar into the grout bag **
5 Gallon Bucket:
A bucket’s a bucket. We didn’t mix NEAR as much as we thought we would at one time, we had high hopes to only have to make one mixture.. HA! We probably went outside 154,987 times to make more mixture. But honestly, we got about 2 grout bags worth out of one mixture (ALSO the bucket does not dry out between mixes, so that’s good - I might have been the only one concerned about this).
Brick Trowel:
Having the triangle at the end was helpful in moving around the mortar on the brick. The sound on the brick is horrendous though, you’ve been warned.
Gloves:
VERY HELPFUL! Kept everything clean. OMG, we started this project without gloves, but the messier you are, the messier the project is. Gloves were a GAME CHANGER in cleanliness, you can just dispose of them when they get -out of control- messy. *If the mortar dries on your hands or the grout bag - it will flake ALL OVER the freaking place (hence the mess). We had to vacuum like 5 times during this project.
Mixing Arm:
Depending on what arm size you get, you might need a larger drill (we did, so we borrowed one). The 30” was a little unnecessary and a bit of an overkill for us, considering we only got so much out of one mixture.. one mixture barely covered the bottom of the bucket. We probably could have used a baking whisk for how little we mixed each time (Just kidding - Kinda).
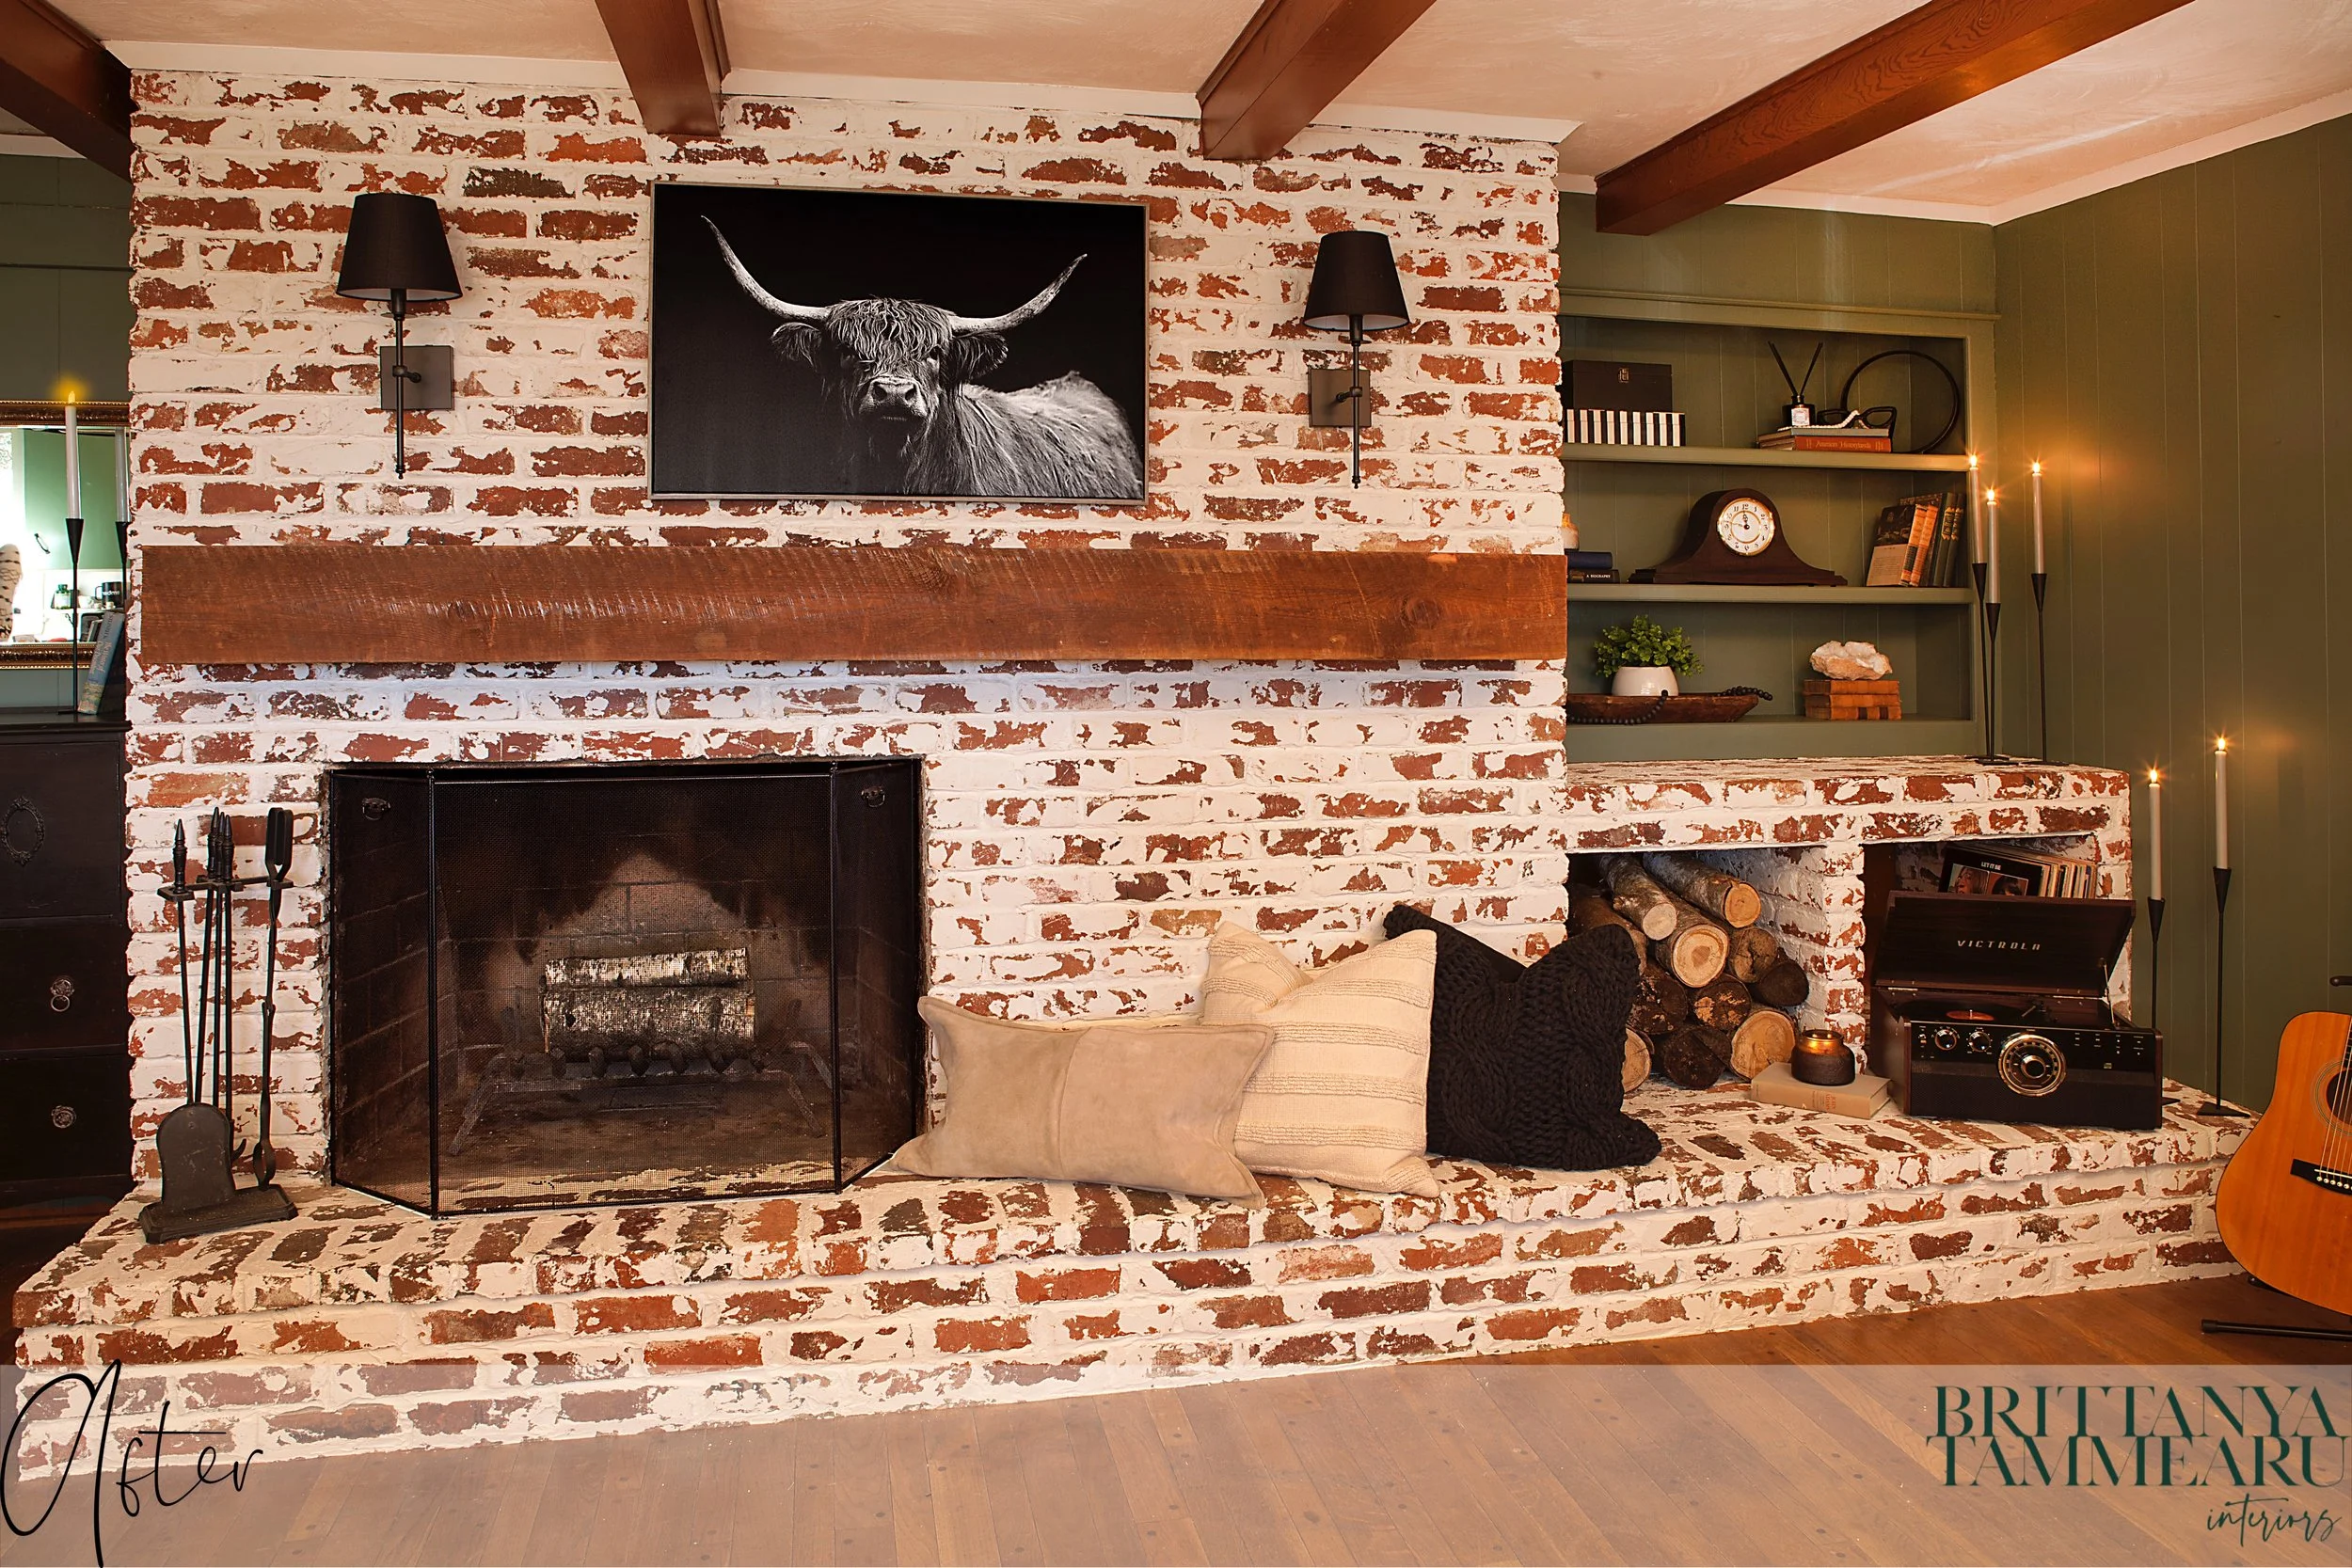
We had MASSIVE mortar gaps between each brick, and they. were. deep. This overall project took us roughly 8 hours for 2 people (2 people that had no idea what they were doing). The fireplace is about 14’ Long x 8’ High x 4’ Deep. A monster. It was a monster of a fireplace. But we did it, and it was totally worth it.
“All our dreams can come true, if we have the courage to pursue them.”
There was a little snag when we were teaching ourselves how to do this and what “technique” works best for us. LUCKILY we had 2 cubbies to “test” the look we liked.
The image on the LEFT was smeared with a SPONGE. Now, this was unintentional, because we actually just wanted to wipe it off… But this accident is also considered an alternative “technique” :)
The image to the RIGHT was our favorite look. We just stayed a little cleaner and smeared the mortar with a brick TROWEL. This has more of a “icing” look.
What’s the difference?
The difference between German Schmear (if you haven’t been reading, this is what we did!), Painted, and Limewash Brick styles. I know the other two options have different strategies and processes, I just don’t know what they are :). There is always more to it than you think.
Why German Schmear?
We wanted to keep the rustic design element and still see some of the brick. We wanted to lighten up the room without completely covering the brick. This specific house has TONS of brick, we wanted to keep the flow intact while still making it its own.
*EXTRA: NEW FIREPLACE MANTEL*

The Why:
This original mantel never really fit the overall “rustic” aesthetic of this den. The scale of this fireplace requires a much heftier mantel. So, that is exactly what we set out to do. The beam-like mantel is now more balanced with the beams on the ceiling.
The biggest struggle was finding a full rough board over 8’ long..


From this — To this — To T H I S!
The how:
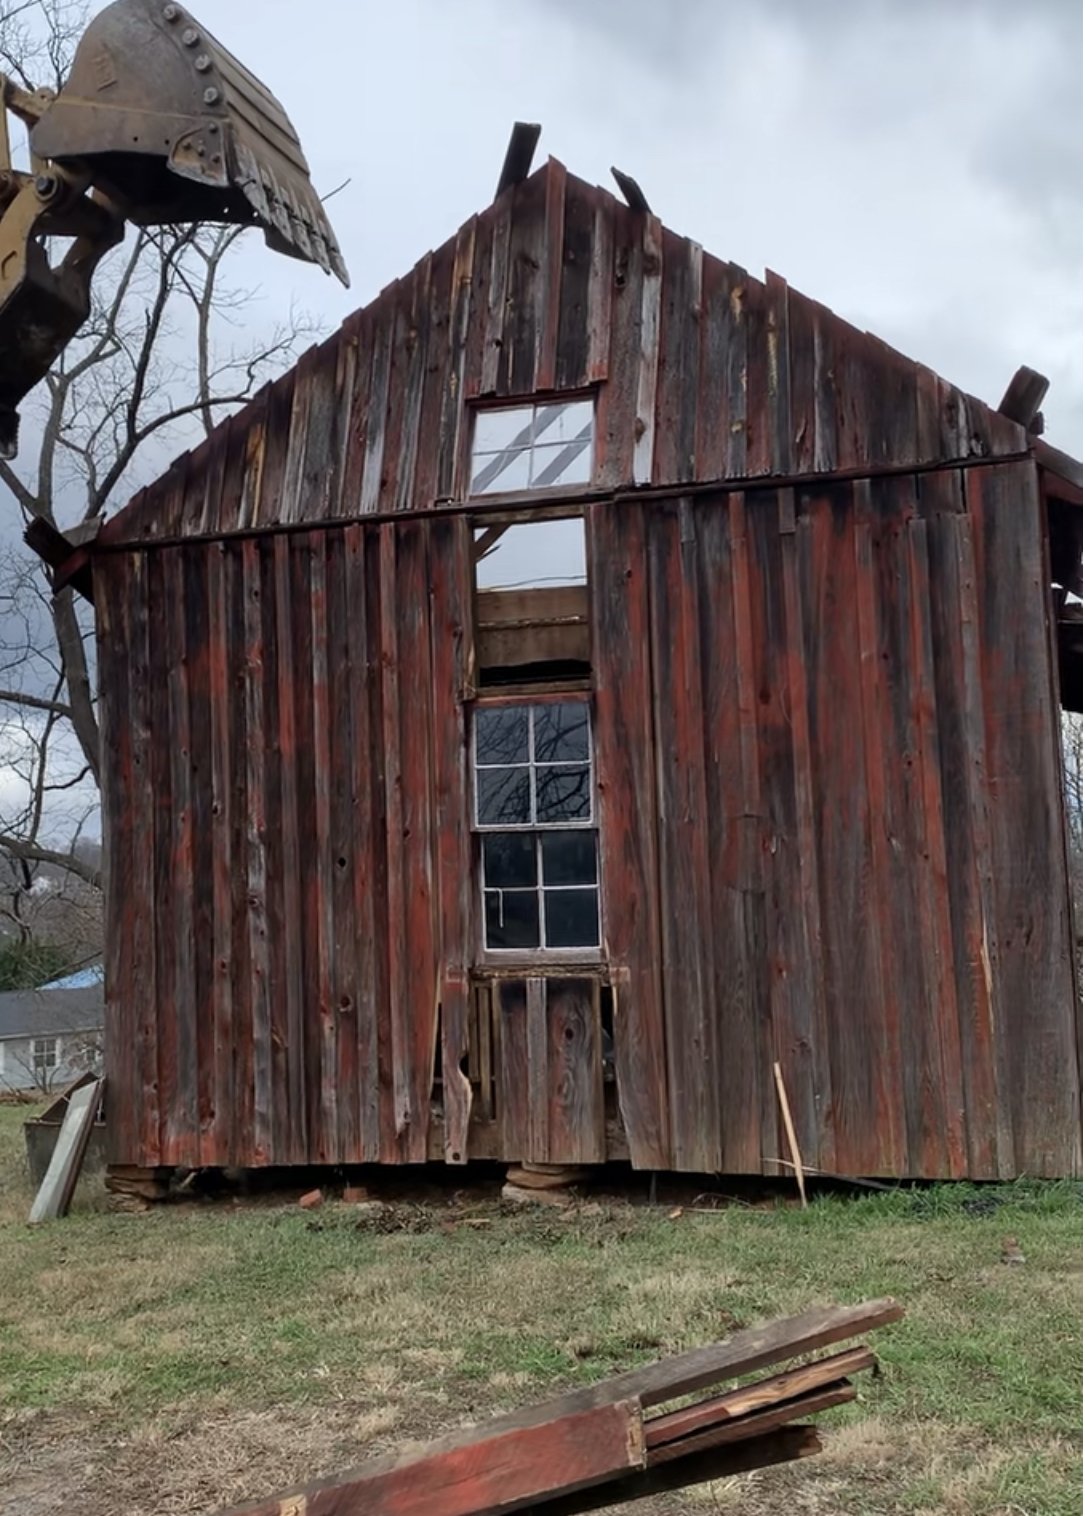
An old barn! This is where the boards came, torn down by a friend.
We scoped out the available boards and found 2 great pieces (9’ long x 7” wide x 2.25” thick — 11’ long x 8.25” wide x 2.75” thick)
We cut one of the boards, lengthwise (to create a top and bottom) Tools used: table saw, hand saw, bandsaw, planer.
There are a few techniques to build this, but I wanted a seamless front, so we went with a 45 degree miter cut.
The Who:
When they say, “It takes a village”, it does. A friend provided the boards, a friend provided the tools in order to cut the boards, and it took two talented guys to construct & assemble such a beautiful, organic fireplace mantel.
Designers visualize, describe, render and spec what they want a design to be. I might be speaking for myself here, but we don’t always know what can go into the execution of getting the design accomplished.
“Patience is bitter, but its fruit is sweet.”
There are times when the design will need some tailoring. There are times the “ideal” alterations cannot be accommodated by the space or motif. The completed project takes time for token execution, so be patient, after all it is a virtue. Beauty takes time but can make time stand still when drinking in the “awe” that time took to sculpt your masterpiece.


***
A special shout out to those we couldn’t have done this project without!
Jeff Bradley: Provided mixing arm and drill for mortar
Barry Pittillo: Provided the beautiful wood for the mantel
Scott Walker: Provided the tools and help to cut the wood for the mantel
Chris Bartol: For taking/editing the wonderful Before & After photos
Rob Merrell & Chris Tammearu: for constructing a mantel masterpiece
If you read this whole post, you deserve a gold star! I appreciate you being here and truly hope you enjoyed this “How To-ish: Where we’re transparent about our mistakes, so we all don’t have to learn the hard way” on applying German Schmear to a brick fireplace. :)
Curious and want to see all of this in Video?
If you’re interested in seeing how this all went down in ACTUAL time - Check out the “German Schmear” highlight on my Instagram Page.
Thank you for being here!
If you liked this post (or used this post information), show it some love and push that heart below!